Applying a Full Screen Pass Renderer Feature to a Canvas in Unity
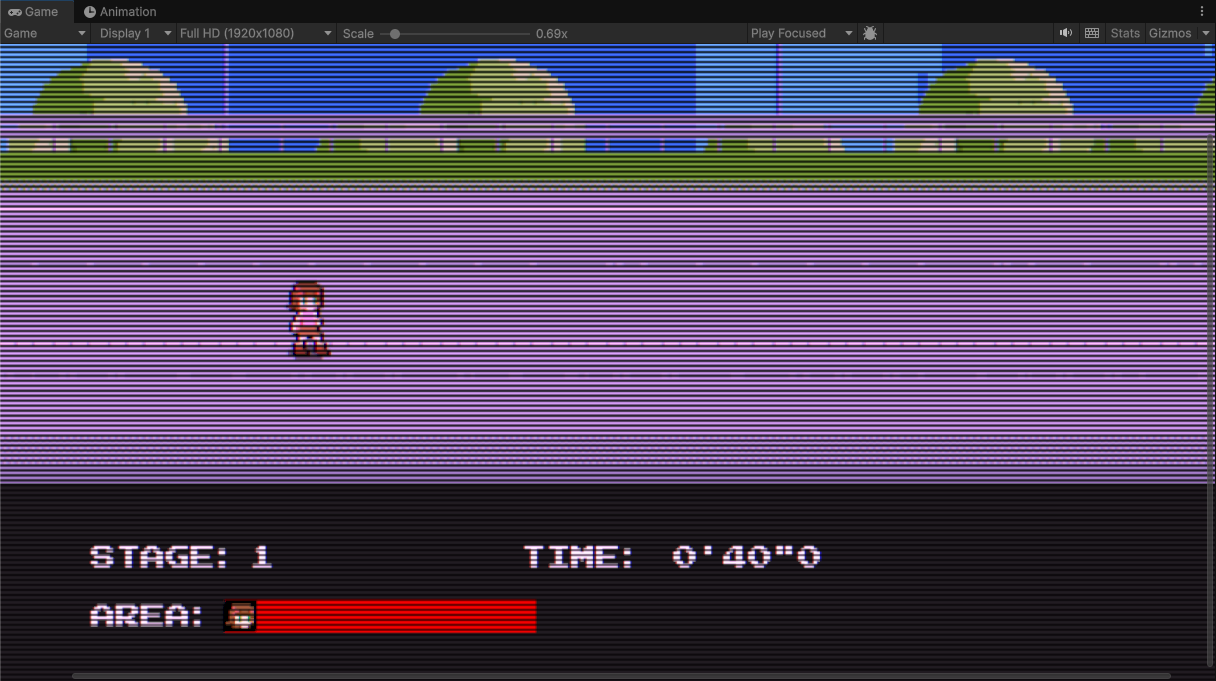
Recently, I’m trying to make a 2d side-scroller retro game for fun.
After finishing a CRT shader, however, I found that it could not be applied to the Canvas through [URP Asset -> Renderer 2D -> Full Screen Pass Renderer Feature].
Since there’s only one main camera currently in the scene, which follows the player during the game, if I attach the Canvas to the main camera, it will start jittering. That’s not what I want.
To handle this, I added another camera as the child of the main camera, for the purpose of displaying the Canvas, which has a hierarchy like this:
Pixel Camera (Base)
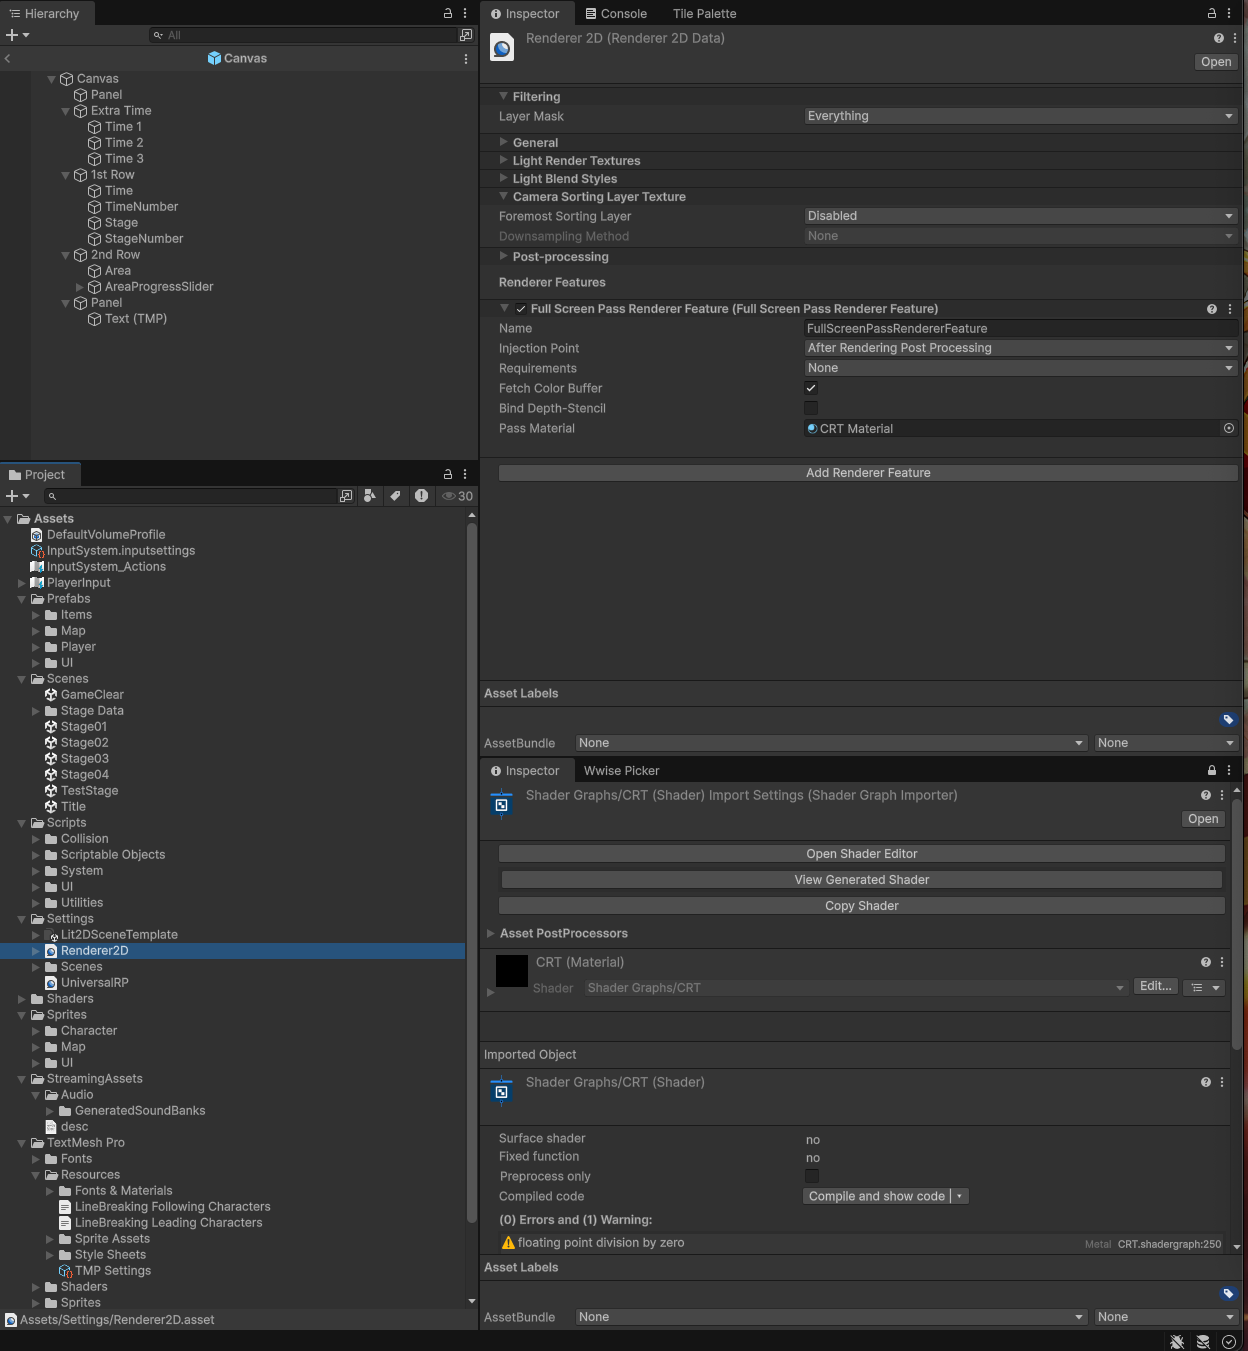
├── UI Camera (Overlay)
Now I can set [Canvas -> Canvas -> Render Camera] to UI Camera, and it won’t jitter when the player is moving.
The UI Camera is added to the Stack in [Pixel Camera -> Camera]. In [UI Camera -> Camera -> Rendering -> Culling Mask], only UI is selected, whereas for the Pixel Camera, everything other than UI is selected in [Rendering -> Culling Mask].
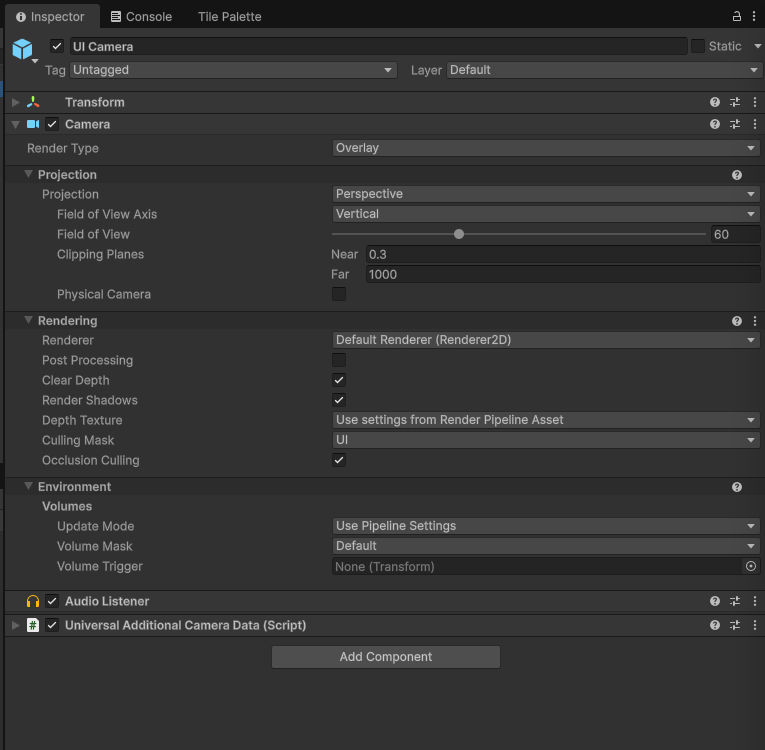
Then, the output of Pixel Camera is set to a Render Texture, which will be used for the overall CRT effect later.
It is necessary to have another Canvas and a Raw Image added to the new Canvas to display the Render Texture.
Right now, there are two cameras and two canvases in the scene:
Pixel Camera (Base)
 ├── UI Camera (Overlay)
Canvas
Canvas For Render
 ├── RawImage
The size of RawImage should be the final resolution of the game.
After setting [RawImage -> Raw Image -> Texture] to the Render Texture created before, it is able to see the CRT effect applied to not only the map, but also to the Canvas.